Illume Nightlamps — 3D Printed Lithophanes
Lithophanes, first created in the 19th century, are special artworks that come to life when backlit, using varied material thickness to create detailed images from light and shadow. Through modern 3D printing, this historic art form is brought into the present, seamlessly transforming digital images into luminous, custom décor and heartfelt gifts that blend technology with artistry.
Story Behind the Design
At its heart, this project explores how design can preserve what matters most, turning sentiment into light and shadow. I created a custom lithophane lamp during a past relationship, reimagining a meaningful image through modern 3D printing and historic artistry. The result was both a design prototype and a heartfelt gesture, showing how design can move beyond utility into storytelling and connection.
Design Approach
Step 1: Image Selection
Start by picking out digital images that stand out with clear contrast. For our lamp printing project, I chose two images to fully utilise the available space.
Start by picking out digital images that stand out with clear contrast. For our lamp printing project, I chose two images to fully utilise the available space.
Step 2: Photo Editing
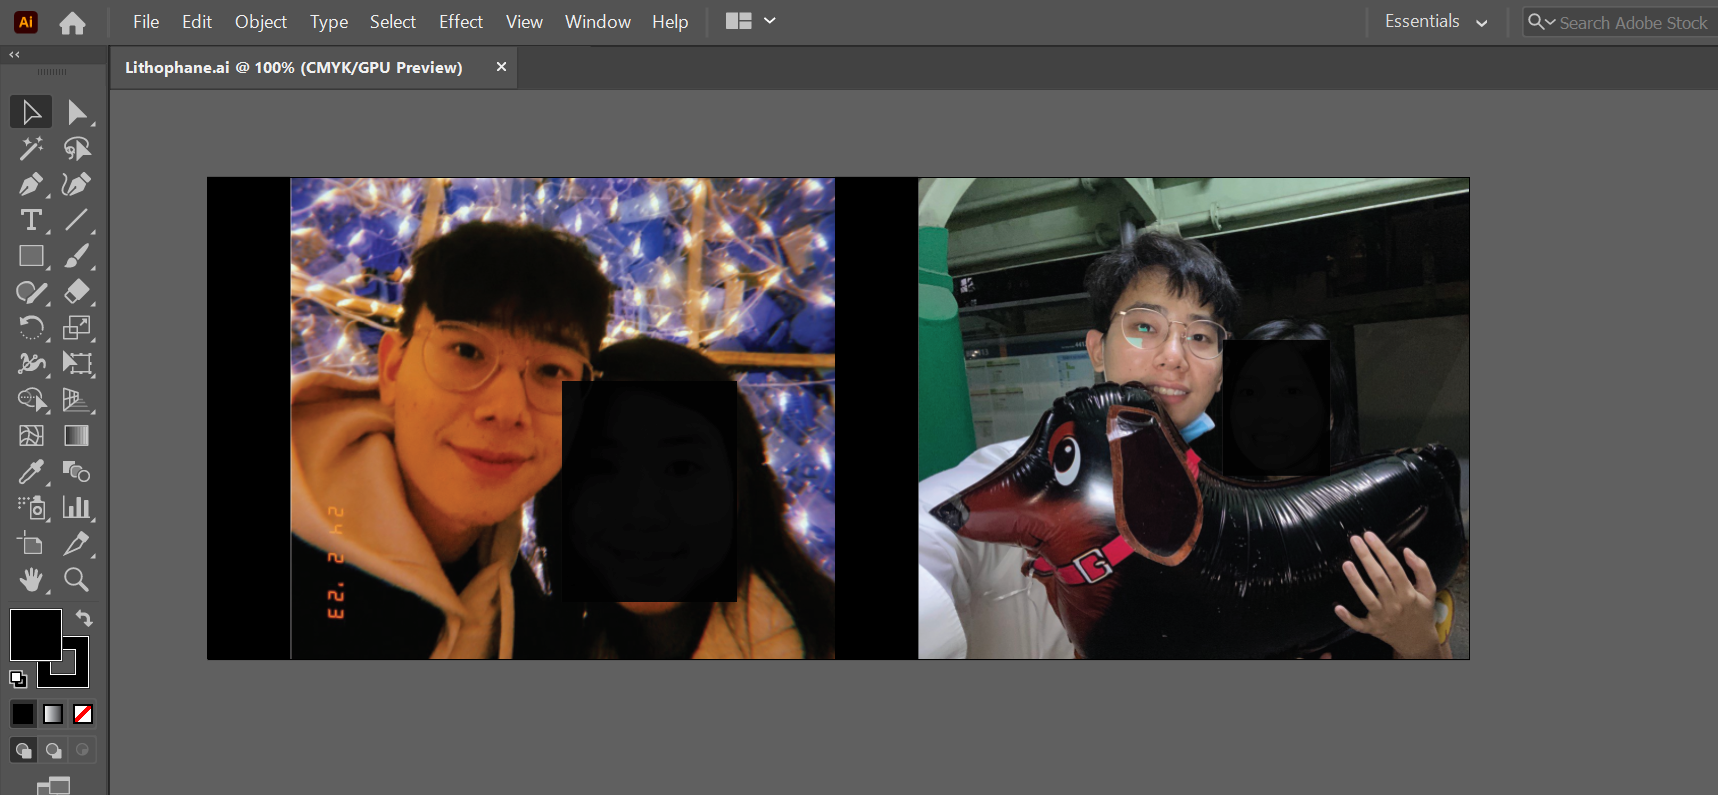
Next, I prepared the images in Adobe Illustrator by cropping them to the correct dimensions and adding black borders between panels. This ensured the layout was precise and aligned, allowing the design to wrap seamlessly around the lamp.
Next, I prepared the images in Adobe Illustrator by cropping them to the correct dimensions and adding black borders between panels. This ensured the layout was precise and aligned, allowing the design to wrap seamlessly around the lamp.
Step 3: Convert the image
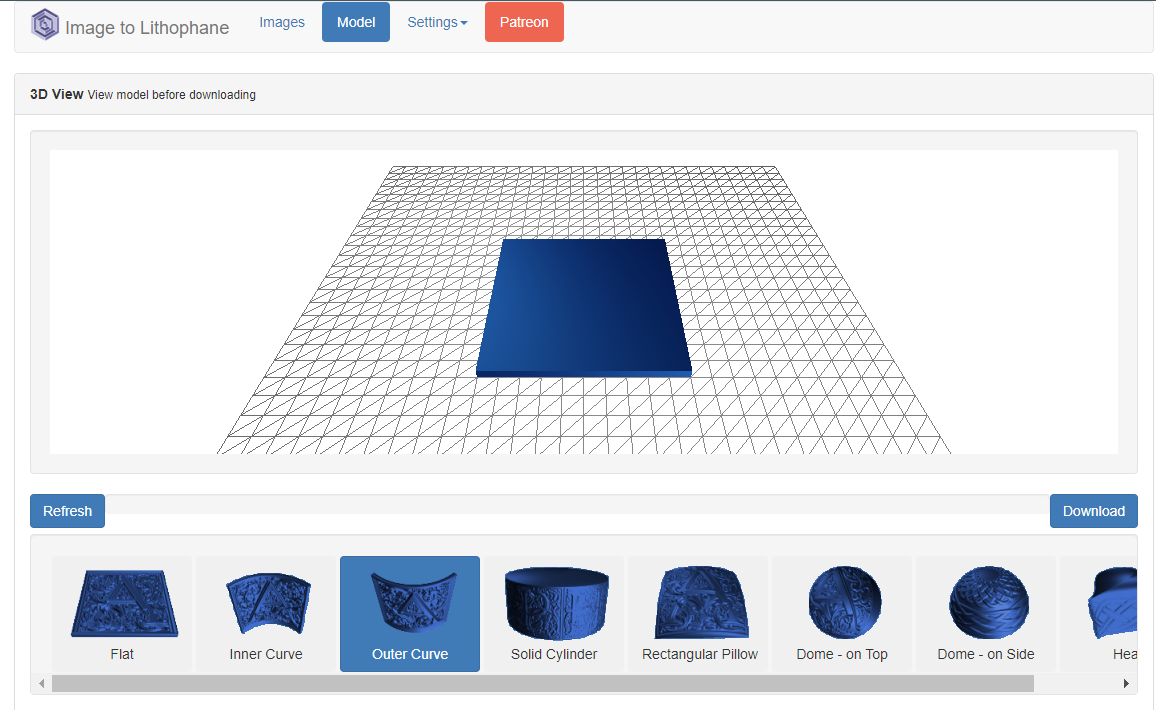
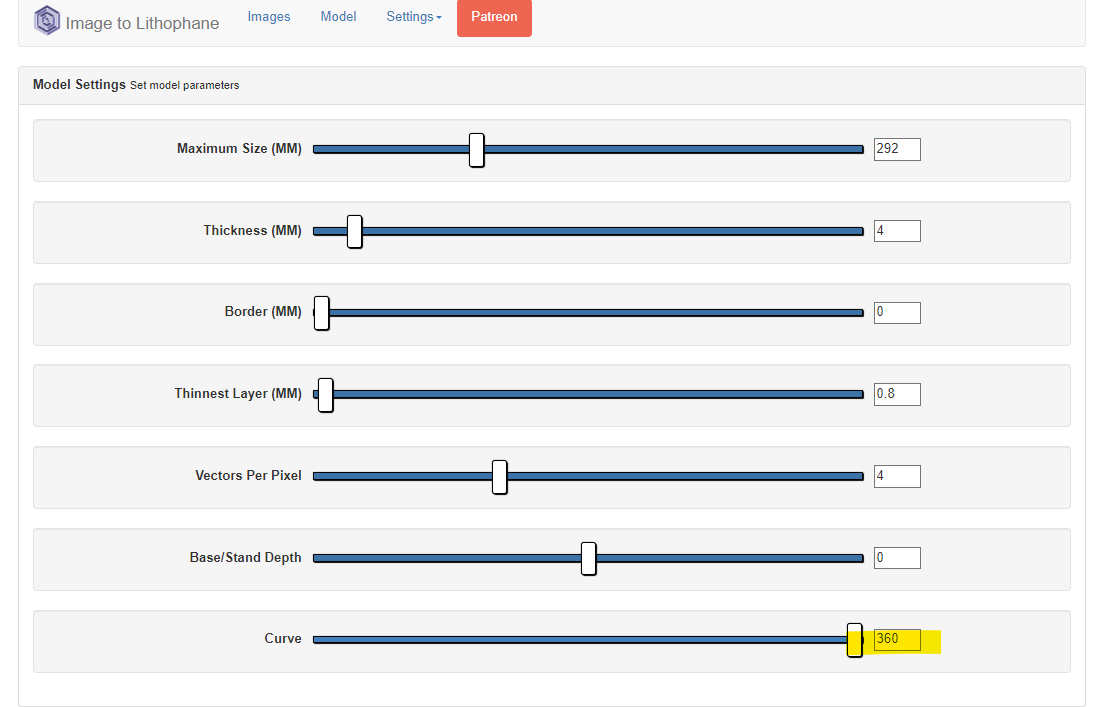
Go to 3dp.rocks/lithophane and select the Outer Curve option. In the top navigation bar, open Settings > Model Settings and adjust the curve slider to 360 degrees. Modify the other parameters according to your preferences, then download the STL file for printing.
Go to 3dp.rocks/lithophane and select the Outer Curve option. In the top navigation bar, open Settings > Model Settings and adjust the curve slider to 360 degrees. Modify the other parameters according to your preferences, then download the STL file for printing.
Here are the parameters I used:
Step 4: Slicing & Printing
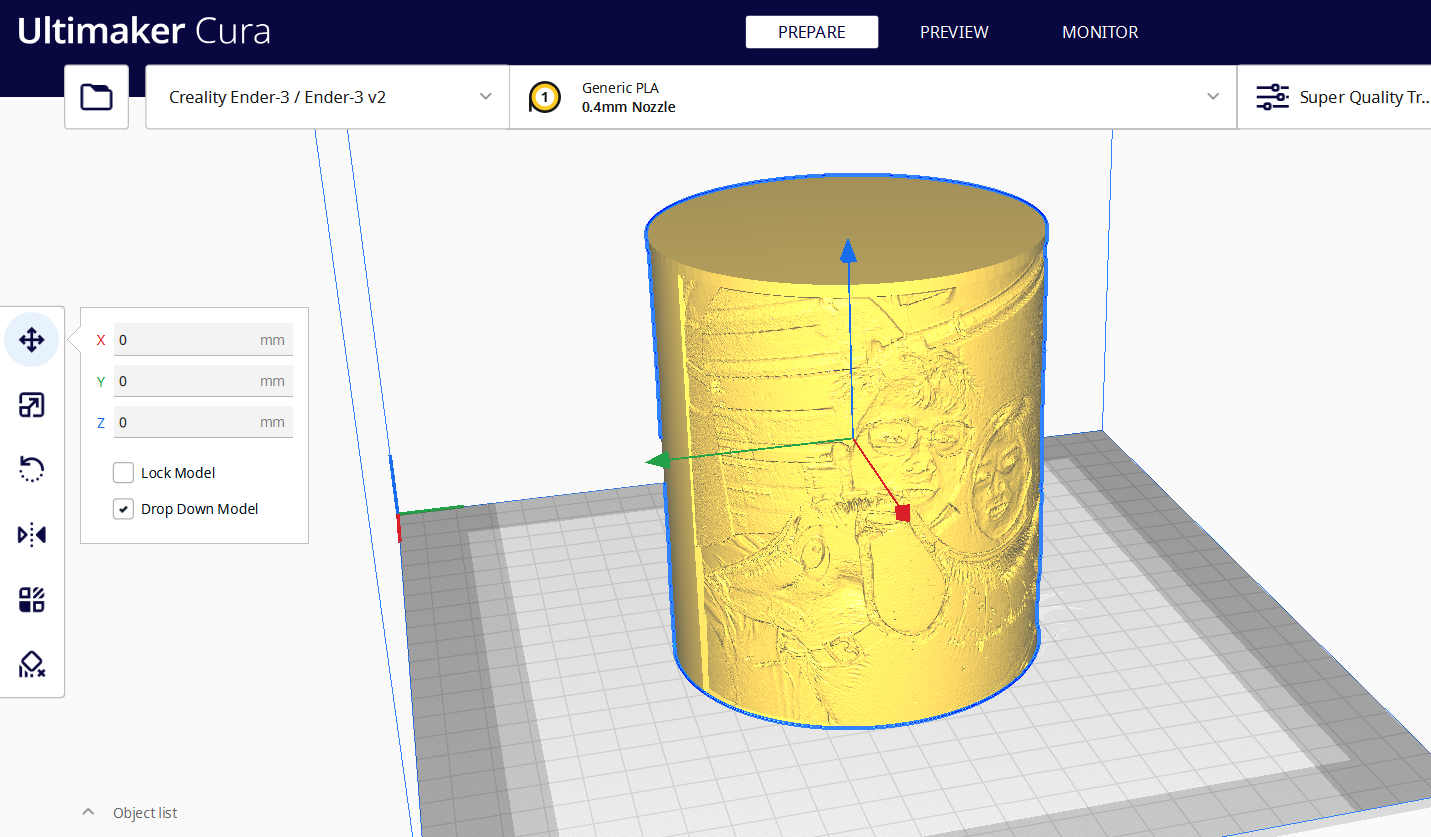
Once your lithophane design is ready, open the STL file in your preferred 3D slicer software and prepare it for printing. For crisp, high‑resolution results, use a layer height of 0.12 mm or less. In this project, I printed with white PLA filament (a popular choice for lithophanes because it diffuses light beautifully), sliced using Ultimaker Cura, and produced the final lamp panel on a Creality Ender‑3 V2 3D printer.
Once your lithophane design is ready, open the STL file in your preferred 3D slicer software and prepare it for printing. For crisp, high‑resolution results, use a layer height of 0.12 mm or less. In this project, I printed with white PLA filament (a popular choice for lithophanes because it diffuses light beautifully), sliced using Ultimaker Cura, and produced the final lamp panel on a Creality Ender‑3 V2 3D printer.

Step 5: Finishing & Assembly
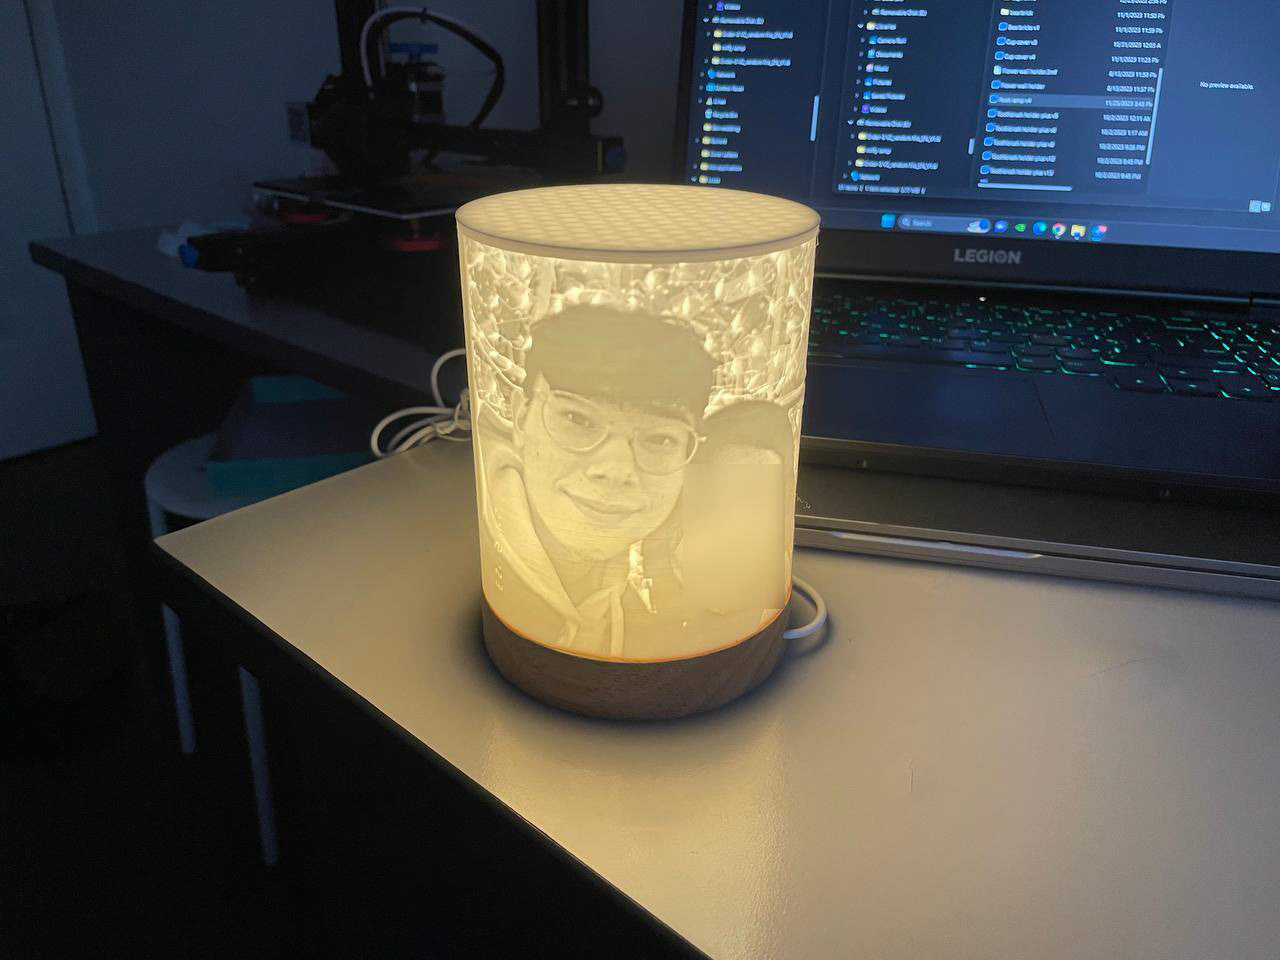
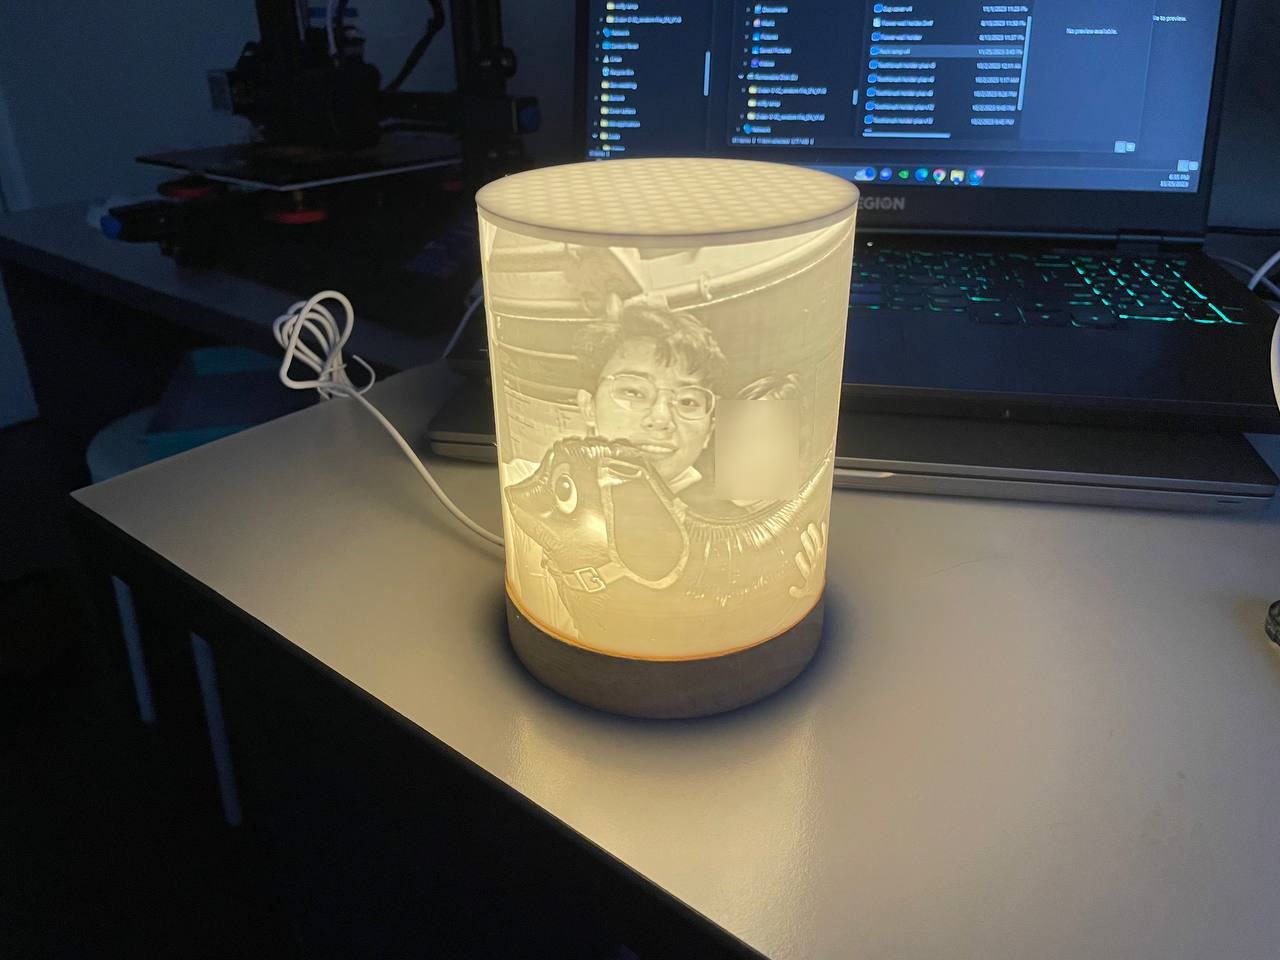
After approximately 12 hours of printing, I used a heat gun to set the piece before securely gluing the lithophane panel onto the rounded wooden lamp base, completing the assembly. With the final assembly complete, the lamp shines with a high‑resolution finish, perfect for an ideal gift.
After approximately 12 hours of printing, I used a heat gun to set the piece before securely gluing the lithophane panel onto the rounded wooden lamp base, completing the assembly. With the final assembly complete, the lamp shines with a high‑resolution finish, perfect for an ideal gift.
Acknowledgements
This project was inspired by RCLifeOn, a talented creator whose Lamp Shade Lithophane Tutorial provided both technical guidance and creative spark. His work showed how lithophane design becomes accessible and versatile when paired with modern 3D printing. The knowledge he shared inspired me to adapt the process into my own interpretation, leading to the Lithophane Night Lights project.
You can check out his tutorial here: https://www.youtube.com/watch?v=vYLtlG359LE